


Free Edibles at $100 & Free prerolls at $150
Let's be real—hitting a dirty bubbler is a complete waste of good flower. If you want to protect your investment and actually enjoy your sessions, learning how to clean bubblers is non-negotiable. That sticky, brown resin and nasty water don't just look gross; they actively destroy the complex terpene profile you paid for.
Imagine a dirty bubbler as a filter that’s already clogged. When you pull fresh vapor through a layer of old resin and swampy water, it just picks up stale, burnt flavors. This gunk completely overpowers the subtle, nuanced notes that make each strain unique.
Instead of that bright, citrusy taste you were expecting, you get a harsh, bitter hit that makes you cough.
Keeping your glass clean isn't just about looks. It's about getting the quality you expect from your flower. A clean piece gives you a pure, unadulterated hit, letting the true profile of your strain shine.
The gunk that builds up in your bubbler is more than just an eyesore. It's a sticky mix of tar and ash that directly gets in the way of a good time.
A clean bubbler is the easiest upgrade you can make to your setup. It ensures every session is as flavorful and smooth as the first, doing justice to the quality of your material.
The benefits go way beyond just taste. A clean bubbler just plain works better, giving you smoother airflow and better percolation. It’s a lot like how other methods, such as vaping, also depend on clean gear for the best performance.
You can see how that plays out in our guide on how to vape weed, where maintenance is key for flavor. Ultimately, keeping your piece clean elevates the entire ritual from a mindless habit into something genuinely enjoyable.
Keeping the right supplies on deck is the secret to turning cleaning from a major drag into a quick, painless routine. When you have a dedicated kit ready to go, you can bust through grime in minutes and get back to what matters—a fresh, clean-tasting session.
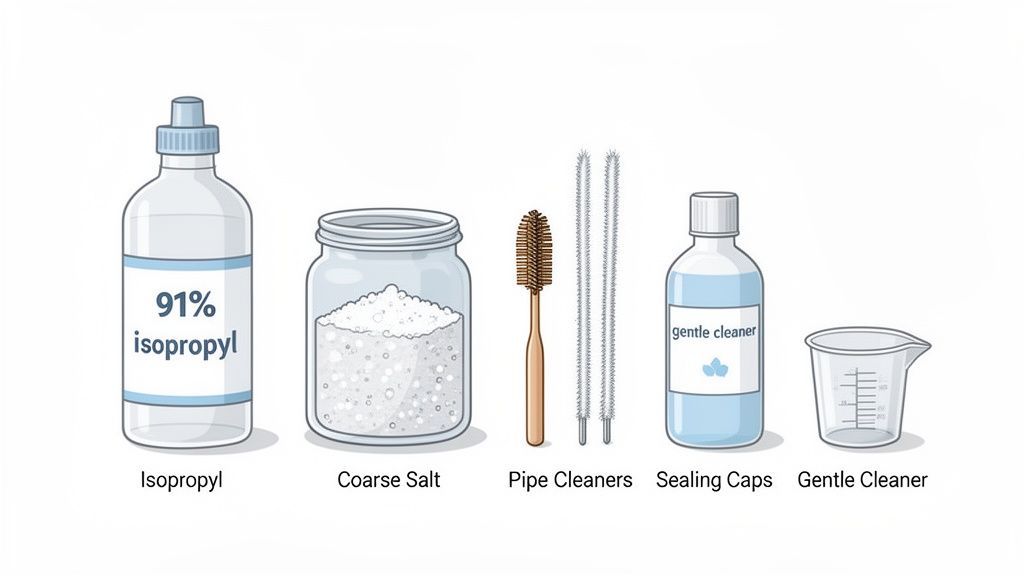
For glass bubblers, you can’t beat the classic combination of isopropyl alcohol and coarse salt. It’s a go-to for a reason. The alcohol is a beast, acting as a powerful solvent that melts away that sticky, impossible resin. At the same time, the salt works as a gentle abrasive, scrubbing off baked-on gunk without scratching your glass.
When you're grabbing your supplies, aim for 91% or higher isopropyl alcohol. Lower concentrations just have too much water and won't cut through resin nearly as well. For the salt, bigger crystals are your best friend.
While alcohol and salt are the main event for most glass pieces, a truly complete cleaning kit needs a few supporting players. These tools make the job faster, less messy, and adaptable for any bubbler material or tricky design.
Pipe cleaners are perfect for navigating the narrow pathways in downstems and mouthpieces. Small, soft-bristled brushes are also clutch for scrubbing stubborn spots in the bowl or percolator that a simple shake just can’t reach.
Assembling your kit is a one-time effort that pays off every single time you clean. You’ll never have to hunt for supplies again, which makes you far more likely to keep your piece sparkling.
To help you get organized, here’s a quick checklist of everything you might need.
This table breaks down the essentials and some helpful extras for keeping your bubbler in top condition.
| Item | Purpose | Best For |
|---|---|---|
| Isopropyl Alcohol (91%+) | Solvent | Dissolving resin and buildup in glass. |
| Coarse Salt | Abrasive | Scrubbing the interior of glass bubblers. |
| Pipe Cleaners/Brushes | Detailing | Reaching tight spots like mouthpieces and downstems. |
| Sealing Caps/Plugs | Mess Prevention | Sealing openings for a spill-free shake. |
| Plastic Wrap & Rubber Bands | DIY Sealing | A good backup if you don't have dedicated caps. |
| Small Funnel | Clean Pouring | Adding salt and alcohol without making a mess. |
| Container/Tub | Soaking | Organizing and soaking smaller, removable parts. |
With these items on hand, you’re equipped to handle pretty much any cleaning job.
A few other accessories will make your life way easier. Reusable sealing caps or plugs are a total game-changer, letting you shake your bubbler with confidence, knowing alcohol solution won't go flying everywhere. If you don't have them, plastic wrap secured with rubber bands is a solid DIY hack.
A small funnel is also great for getting salt and alcohol into your piece without spills. With this complete toolkit, you'll have everything you need to keep your bubbler pristine, preserving its flavor and function for years to come.
Ask any seasoned smoker their go-to cleaning method, and they’ll almost always tell you two things: isopropyl alcohol and salt. This combo is the undisputed champion for cleaning glass bubblers, and for good reason—it just flat-out works. It's a simple but brilliant system: the alcohol acts as a solvent to dissolve all that sticky resin, while the salt provides the abrasion to scrub it all off from the inside.
For this to work, you absolutely need 91% or higher isopropyl alcohol. Anything less has too much water and won't cut through the gunk effectively. You'll also want a coarse salt, like Epsom or chunky sea salt. Don't even think about using fine table salt; it dissolves way too fast and won't give you any of that crucial scrubbing power.
First things first, get your bubbler ready. Dump out any old water and give it a solid rinse with warm tap water to knock out any loose bits and pieces. It's a small step, but it makes a huge difference in how well the alcohol and salt can attack the really stubborn buildup.
If your bubbler has a removable bowl or downstem, take them out now. You’ll want to clean those separately to make sure every single part gets the attention it needs. Plus, it keeps them from rattling around and potentially getting damaged while you're shaking the main piece.
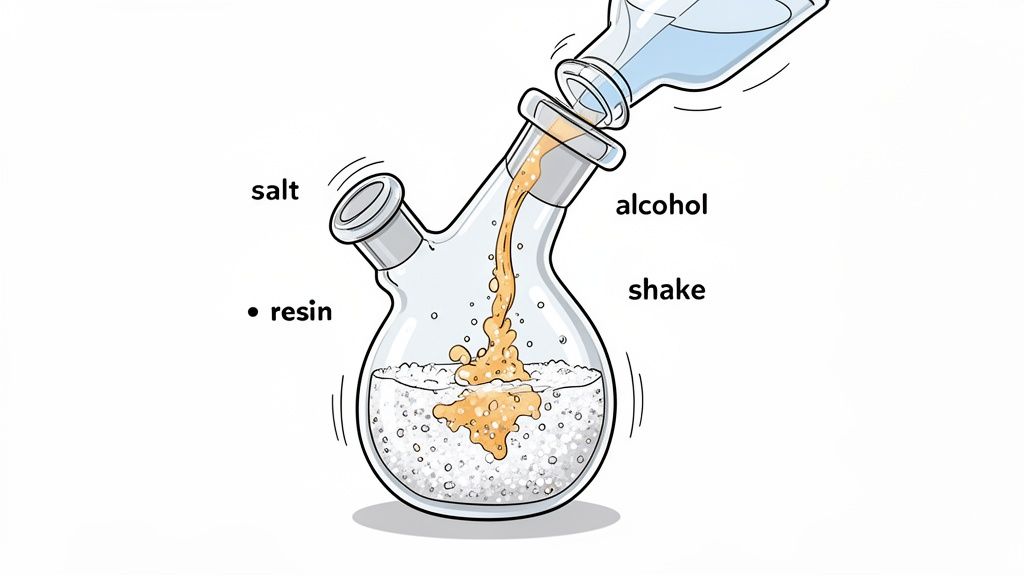
Time to mix your magic solution. The best part? You can do it right inside the bubbler. No need to get out the measuring cups. Just eyeball it—add enough coarse salt to form a solid layer at the bottom. For an average-sized bubbler, a couple of generous tablespoons should be perfect.
Once the salt is in, pour in your isopropyl alcohol until the bubbler is about a third full. You need enough liquid to swish around easily, but you also want plenty of air space to get some real momentum going when you shake. That mix of salt and alcohol creates the ultimate abrasive slurry that will scour every inch of your glass.
The real magic here is the salt. As you shake, those gritty crystals act like thousands of tiny little scrubbers, physically dislodging resin from the glass while the alcohol dissolves it away.
Before you start shaking, you have to seal all the openings. If you have dedicated cleaning caps, great. If not, don't sweat it—a bit of plastic wrap held tight with a rubber band works just as well to create a spill-proof seal over the mouthpiece and joint.
Now for the fun part: shake it like you mean it. Get a firm grip and shake vigorously for at least one to two minutes. Make sure you’re tilting and turning it so the slurry hits every surface, especially inside tricky spots like the percolator. You’ll immediately see the alcohol turn a nasty brown, which is a good sign it's working.
If you’ve got some really caked-on resin, let the mixture soak for about 30 minutes before giving it another good shake. That extra time lets the alcohol do its job and penetrate the toughest gunk.
Once you’re satisfied that the inside is sparkling, carefully unseal the openings and pour that dirty brown liquid down the drain. This next step is critical: rinse the bubbler thoroughly with warm water. Keep rinsing until you can’t see a single grain of salt or smell even a hint of alcohol.
Seriously, be meticulous here. Any alcohol left behind will completely ruin the flavor of your next session. For an extra clean finish, a final rinse with a bit of lemon juice can help neutralize any lingering smells.
Let your bubbler air dry completely on a towel before putting it all back together. The reward is a perfectly clean piece that looks, feels, and tastes like new.
Sometimes, the standard shake-and-rinse just doesn't cut it. We’ve all been there—facing a bubbler with deeply stained glass or resin that seems practically fossilized in place. When that happens, it's time to bring out the heavy hitters.
These deep-cleaning methods are for those moments when caked-on gunk needs a serious intervention to bring your piece back to life. It's especially important if you've invested in quality glassware. With the U.S. cannabis market projected to hit $45.35 billion by 2025, more of us are appreciating our gear and want to keep it in prime condition for the best experience. Read more about the expanding cannabis market and consumer trends to see why proper maintenance is becoming so important.
For a nearly hands-off deep clean, the extended soak is your best friend. This is my go-to for pieces that have been neglected a little too long, where the grime seems impossible to scrub away with just a quick shake.
It’s a low-effort, high-reward strategy. Just submerge your glass bubbler completely in a container filled with 91% or higher isopropyl alcohol. If you have smaller parts, like the bowl, you can toss them in a separate Ziploc bag with some alcohol. Let it all soak for at least 12 hours, or even a full day for the really tough jobs. The long soak lets the alcohol do all the work, slowly breaking down even the most hardened resin.
This hands-off approach is incredibly effective. After the soak, most of the grime will have dissolved, and any remaining bits should rinse away easily with hot water.
For durable, all-glass pieces—and I mean 100% glass with no plastic or rubber parts—boiling can work wonders. But this method comes with a huge warning: never put a cold glass piece into boiling water or a hot piece into cold water. That’s a recipe for thermal shock, which will crack or shatter your bubbler in an instant.
Here’s how to do it safely:
Once it's back to room temp, a quick rinse should wash away any leftover residue. This is usually my last resort for pieces that nothing else can conquer. If you're just working on smaller parts, our guide on cleaning a bowl effectively has some more specific tips.
If you're looking for a truly professional-grade clean, an ultrasonic cleaner is the modern, hands-off answer. These devices use high-frequency sound waves to create microscopic bubbles in the cleaning solution. When these tiny bubbles implode, they create a powerful scrubbing action that blasts grime from every little crevice, even inside intricate percolators that are otherwise impossible to reach.
Just fill the machine with a specialized cleaning solution or even just hot, soapy water, drop your bubbler inside, and let it run. It's definitely an investment, but if you're a collector with intricate or valuable glass, the results are simply unmatched.
While isopropyl alcohol is the undisputed champion for cleaning glass, it can be an absolute disaster on other materials. If you’ve got a silicone or acrylic bubbler, you need a completely different game plan. Using the wrong cleaner on these pieces can cause permanent damage, so let’s get it right.
Acrylic, in particular, is extremely sensitive to alcohol. The solvent can make the plastic brittle, cause tiny micro-fractures, and leave it with a permanent, foggy look. Forget the iso—a much gentler approach is needed to keep your acrylic piece looking fresh and functioning properly.
The best way to clean an acrylic bubbler is with something you already have: warm, soapy water. A few drops of standard dish soap in warm (not hot!) water is all you need.
For really stubborn spots, you can find specialized cleaners made specifically for plastics. These formulas are designed to dissolve resin without harming the acrylic itself.
Never use alcohol, salt, or any harsh solvents on an acrylic bubbler. The damage is almost always irreversible, turning a crystal-clear piece into a cloudy, weakened mess. Protecting your gear is all about using the right tool for the job.
Silicone is way more forgiving than acrylic, but it comes with its own little quirk: it can absorb odors over time. Keeping it fresh is all about regular cleaning. Soapy water works perfectly for a basic clean, and since silicone is so flexible, you can bend and squeeze it to get into every nook and cranny.
When you’re up against tough residue or funky smells, you’ve got a couple of great options:
This decision tree gives you a quick visual on when to pull out the bigger guns, like boiling for glass versus a simple soak for other materials.
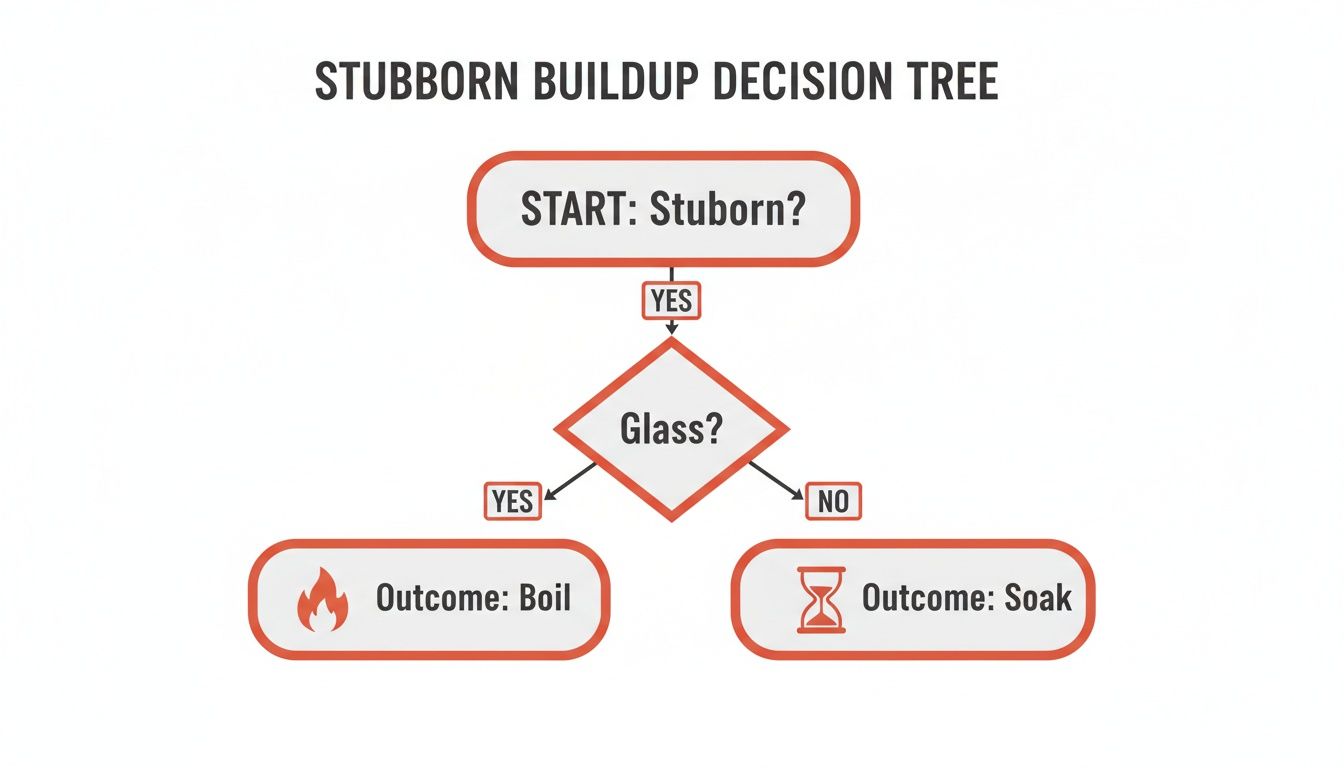
As the chart illustrates, the material your bubbler is made of is the most important factor in deciding how to deep clean it. By tailoring your approach, you can make sure every piece in your collection stays in pristine condition.
Here's the rewritten section, designed to sound completely human-written while preserving all original requirements.
Look, the best way to clean your bubbler is to avoid letting it get disgustingly dirty in the first place. Think of it like any other piece of gear you own—a little bit of care upfront saves you from a massive, deep-cleaning headache later on.
Just a few simple habits will keep your hits tasting fresh and your glass looking great with almost no extra effort.
The single biggest game-changer? Changing the water after every single session. Seriously. That gross brown ring and funky smell come from stale water where resin and gunk have been left to fester. It settles onto the glass and creates a stubborn film that you'll have to scrub like crazy to get off later.
Beyond swapping the water, a quick rinse right after you're done is a total game-changer. As soon as you finish a session, dump the old water and give the whole bubbler a quick flush with hot tap water.
This simple move rinses out all the loose bits and fresh residue before they cool down and harden into a sticky, caked-on nightmare. It takes less than a minute but can easily double the time between your deep cleans.
"An ounce of prevention is worth a pound of cure. A quick rinse after each use does more to prevent long-term buildup than any deep-cleaning method can undo."
If you want an extra layer of protection, think about using a resin-preventing water additive. These are typically natural, plant-based drops that create a super-thin, slick barrier inside your glass.
This coating stops resin from sticking directly to the surface in the first place. The next time you go to clean it, all that grime just slides right off. It’s a clever little trick that makes maintenance so much faster.
On that note, keeping all your gear clean is key for a good experience, which is why knowing how to unclog a disposable vape is just as important.
Even the most seasoned pros run into questions when it comes to keeping their glass pristine. Let's clear the air and tackle the most common ones we get about cleaning a bubbler.
To keep things tasting fresh, you should be swapping out the water daily. A quick rinse with hot water after you’re done with a session also works wonders—it stops gunk from getting a foothold in the first place.
As for a deep clean? If you're a regular user, aim for at least once a week with the isopropyl and salt method. The moment you notice that harsh, funky taste or see grime building up, it’s time. Don't wait.
You can, but you really shouldn't. It just doesn't work well. The magic of the alcohol-and-salt method comes from using coarse salt, like Epsom or sea salt. Those bigger, jagged crystals are what physically scrub the stubborn resin off the inside of your glass.
Table salt is so fine that it dissolves almost immediately in the alcohol. When that happens, you lose all that abrasive scrubbing power. You’re just left sloshing around salty liquid that won’t get your piece clean.
Key Takeaway: The size and grit of coarse salt are non-negotiable for a real clean. Its scrubbing action is what breaks down the resin, so always grab the coarse stuff.
We get the appeal—it feels less wasteful. But honestly, it's a bad idea. After just one cleaning session, that isopropyl alcohol is completely saturated with resin, tar, and all the other gunk from your bubbler.
Trying to clean with that dirty solution is a waste of time. It’s far less effective and can even leave a nasty, sticky film on your glass that ruins the flavor of your next session. For a truly clean piece, always start with fresh alcohol every time you do a deep clean.
Ready for a premium session in your sparkling clean piece? Explore the California-crafted collection at Melt and discover top-shelf THCA flower and disposables that are worth keeping your gear clean for. Shop the full collection at meltofficial.com.
Your cart is currently empty.